A stuck bottle cap usually results from vacuum pressure, sticky residues, or thermal expansion. Use friction-boosting materials like rubber bands or towels, apply gentle heat to the cap only, or try the leverage method with bottle loops for safe opening.
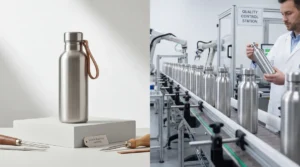
After manufacturing over 3 million stainless steel bottles at our Cupique factory, I have seen every cap-related problem imaginable. Let me walk you through the proven solutions that work.
Stuck bottle caps are caused by vacuum pressure, residues, or thermal expansion.True
The passage states that stuck bottle caps are usually caused by these factors.
The best way to open a stuck bottle cap is to use a wrench or pliers.False
The passage recommends using friction-boosting materials, gentle heat, or the leverage method, not tools like wrenches or pliers.
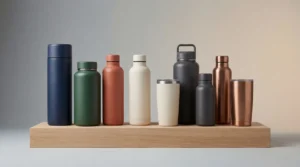
Why Does My Stainless Steel Water Bottle Cap Get Stuck
Your morning coffee routine turns into a wrestling match when your bottle cap refuses to budge. This problem hits insulated bottles harder than regular ones.
Vacuum pressure from cooling hot liquids creates the strongest seal. Temperature differences between cap materials and bottle bodies, plus dried beverage residues, compound the sticking problem significantly.

Understanding the root cause helps you choose the right solution. I have identified four main culprits that turn your convenient bottle into a puzzle box.
The Science Behind Stuck Caps
The vacuum effect ranks as the number one culprit for insulated bottles. When you pour hot coffee or tea into your bottle and seal it immediately, the air and steam inside contract as temperature drops. This creates powerful negative pressure inside, making atmospheric pressure press the cap down like an invisible hand.
Sticky residue problems come from sugary drinks, juices, and protein shakes. These liquids leave behind dried residues in the cap threads. The dried sugars or proteins act like glue, literally bonding the cap to the bottle body.
Thermal expansion mismatch occurs because caps (usually PP plastic) and bottle bodies (stainless steel) have different expansion coefficients. After extreme temperature changes, like moving from a refrigerator to hot water washing, the materials deform differently and can "bite" together.
| Cause | Severity | Common Scenarios | Solution Difficulty |
|---|---|---|---|
| Vacuum Effect | High | Hot drinks sealed immediately | Moderate |
| Sticky Residues | Medium | Sugary/protein drinks | Easy |
| Thermal Mismatch | Low | Temperature extremes | Easy |
| Overtightening | Medium | Excessive force applied | Easy |
Simple overtightening happens when you or the previous user twisted the cap beyond the silicone seal's normal working pressure. The solution requires understanding proper tightening force.
Vacuum pressure from cooling liquids causes stainless steel bottle caps to get stuckTrue
The section states that vacuum pressure from cooling hot liquids creates the strongest seal, leading to bottle caps getting stuck.
Regular water bottles do not experience the same cap sticking problem as insulated bottlesFalse
The section indicates that the cap sticking problem hits insulated bottles harder, but does not state that regular bottles do not experience the problem.
What Are the Easiest Tricks to Open a Stuck Bottle Cap
You need your drink now, not after a 20-minute battle with physics. These methods work without damaging your bottle or requiring special tools.
Friction boosting with rubber bands or towels provides the safest first approach. Heat application to cap areas only, leverage techniques, and gentle percussion tapping offer escalating solutions.

I recommend trying these methods in order, starting with the gentlest approach. Each technique targets a specific type of sticking mechanism.
Method Rankings by Effectiveness
The friction boost method works as your safest, most preferred option. Wrap a wide rubber band around the cap, or use a dry towel, silicone hot pad, or rubber gloves to cover the cap completely. This dramatically increases your hand's grip strength and friction, allowing you to apply greater torque safely.
The hot water trick targets thermal expansion. Run hot (not boiling) water over the cap area only for about 30 seconds. Heat makes the plastic or metal cap expand slightly, breaking its tight engagement with the bottle body. Never use boiling water or submerge the entire insulated bottle, as this can damage the vacuum insulation layer.
| Method | Success Rate | Risk Level | Time Required |
|---|---|---|---|
| Friction Boost | 85% | Very Low | 30 seconds |
| Hot Water | 90% | Low | 1 minute |
| Leverage | 75% | Medium | 1 minute |
| Percussion | 60% | Medium | 2 minutes |
Advanced Techniques
The leverage advantage works when your cap has a loop or handle. Thread a sturdy object like a spoon handle or chopstick through the loop, using it as a lever to increase turning force. Apply force slowly and steadily to avoid breaking the loop mechanism.
The percussion tap method uses controlled vibration to break dried residue bonds. Use a spoon handle or similar hard object to gently tap around the cap's edge. This vibration can crack the dried residues causing the sticking, loosening the cap connection.
Rubber bands and towels can help open stuck bottle capsTrue
Friction from rubber bands or towels can provide the grip to open stuck caps.
Forcefully prying open stuck bottle caps is the best approachFalse
The text recommends gentle methods like leverage and percussion over forceful prying.
How Can I Prevent My Bottle Cap from Getting Stuck in the Future
Prevention beats any opening technique. Small changes in your bottle habits eliminate 90% of sticking problems before they start.
Vent hot liquids before sealing, clean threads thoroughly after each use, apply minimal food-safe lubricant, and avoid overtightening to prevent most cap-sticking scenarios.

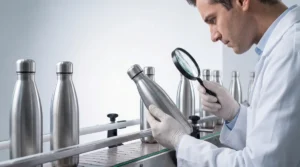
These prevention strategies come from our quality control testing where we cycle caps thousands of times. Simple habits make the biggest difference.
Essential Prevention Habits
Venting before sealing provides the most effective vacuum prevention method. After adding hot drinks, leave the bottle open for one minute to release steam. Let the temperature drop slightly before sealing. This prevents the vacuum effect that causes most sticking problems.
Thread cleaning requires religious attention to detail. Every time you wash your bottle, use a small brush to clean both the cap and bottle mouth threads thoroughly. Ensure no beverage residues remain, eliminating the "gluing" problem at its source.
| Prevention Method | Effectiveness | Effort Required | Long-term Benefits |
|---|---|---|---|
| Pre-venting Hot Liquids | 95% | Minimal | Prevents vacuum issues |
| Thread Cleaning | 90% | Low | Eliminates residue buildup |
| Proper Tightening | 80% | None | Reduces overtightening |
| Lubrication | 70% | Minimal | Smooth operation |
Advanced Prevention Techniques
Food-safe lubrication involves applying an almost invisible amount of coconut oil or food-grade lubricant to the bottle mouth threads after cleaning and drying. This prevents threads from binding too tightly while maintaining food safety standards.
Proper tightening technique requires knowing when to stop. When you feel resistance while tightening, add just a little more force and stop. The silicone ring inside handles sealing duty, so maximum force is unnecessary and counterproductive.
Proper bottle cap maintenance prevents most sticking issuesTrue
Venting hot liquids, cleaning threads, and avoiding overtightening can eliminate 90% of cap sticking.
Using a strong adhesive to seal the cap prevents it from getting stuckFalse
Overtightening or adhesive can actually increase the likelihood of cap sticking.
What Methods Should I Avoid When Opening a Stuck Bottle
Desperation leads to bottle destruction. Some "solutions" cause permanent damage that costs more than the convenience they promise.
Never use pliers, wrenches, or prying tools. Avoid using teeth or wedding rings. These methods damage threads, create bacteria-harboring scratches, and compromise bottle integrity.

I have seen countless bottles ruined by well-meaning but misguided opening attempts. These methods seem logical but create expensive problems.
Destructive Methods to Avoid
Metal tools like pliers and wrenches cause permanent damage to caps and bottle bodies. They create scratches that harbor bacteria and destroy the sealing mechanism, leading to leaks and contamination. The repair cost exceeds the bottle's value.
Using teeth presents serious injury risks. Dental damage from this practice requires expensive treatment and creates long-term oral health problems. No bottle opening justifies risking your teeth.
| Wrong Method | Damage Type | Repair Cost | Safety Risk |
|---|---|---|---|
| Metal Tools | Permanent scratches/dents | High | Medium |
| Teeth | Dental injury | Very High | High |
| Prying | Thread damage | Medium | Low |
| Excessive Force | Seal failure | Medium | Low |
Why Prying Fails
Prying with knives, keys, or rings targets the wrong mechanism. Threaded caps work by rotation, not leverage. Prying damages the sealing ring and bottle mouth, creating leak points and contamination risks. The threading system cannot handle lateral forces effectively.
The wedding ring method popularized online works occasionally but risks damaging both your ring and bottle. The forces involved can deform precious metals and scratch bottle finishes permanently.
Using pliers, wrenches, or prying tools damages bottlesTrue
The snippet states these methods damage threads, create scratches, and compromise bottle integrity.
Using teeth or a wedding ring is an effective way to open a stuck bottleFalse
The snippet states these methods should be avoided as they damage the bottle.
Conclusion
Master these techniques and prevention habits to never fight a stuck cap again. Your bottle should enhance your life, not complicate it.